- Blog
- March 2, 2026
2026 Cheap Bike Build Off: 1977 Schwinn Le Tour II
Jared Kukura
Executive BIkefisher
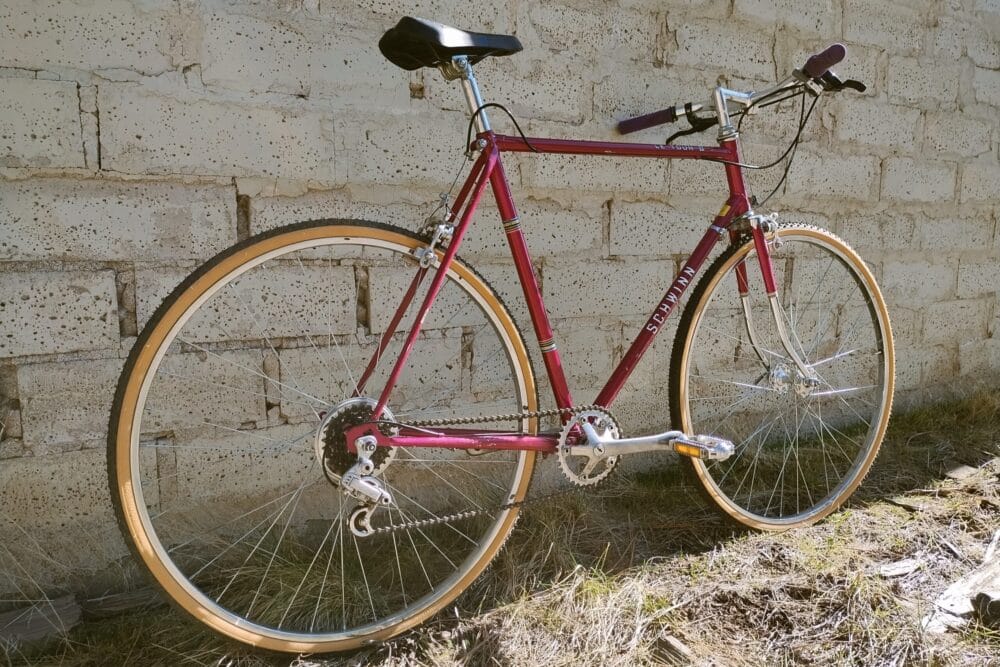
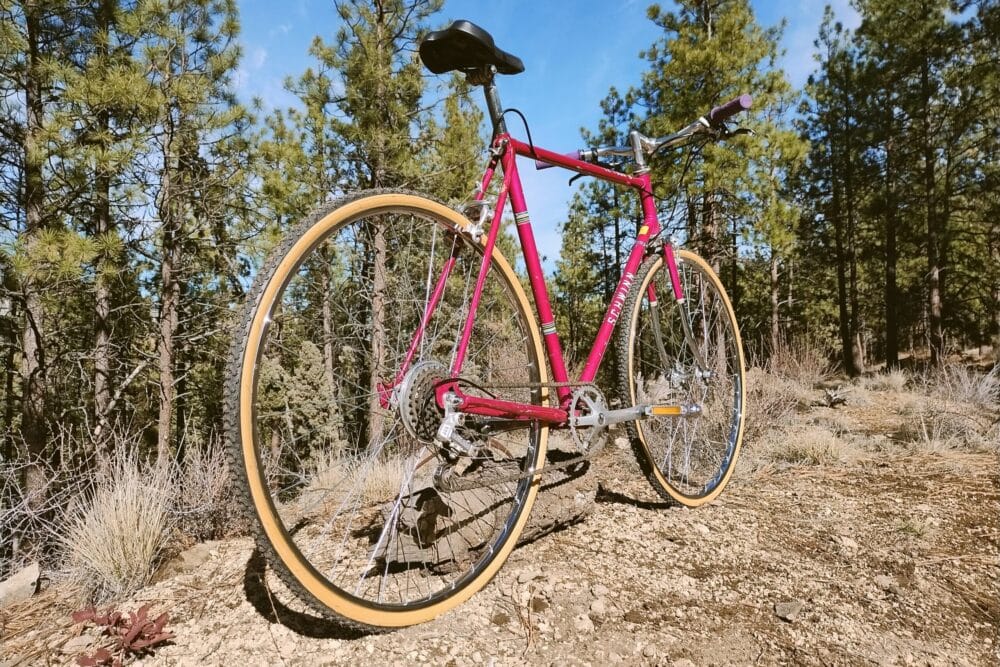
My submission for the 2026 Cheap Bike Build Off is a 1977 Schwinn Le Tour II. I converted the vintage drop bar road bike to a flat bar 1x setup with gravel tires. The bike is perfect for quick errands and coffee rides.
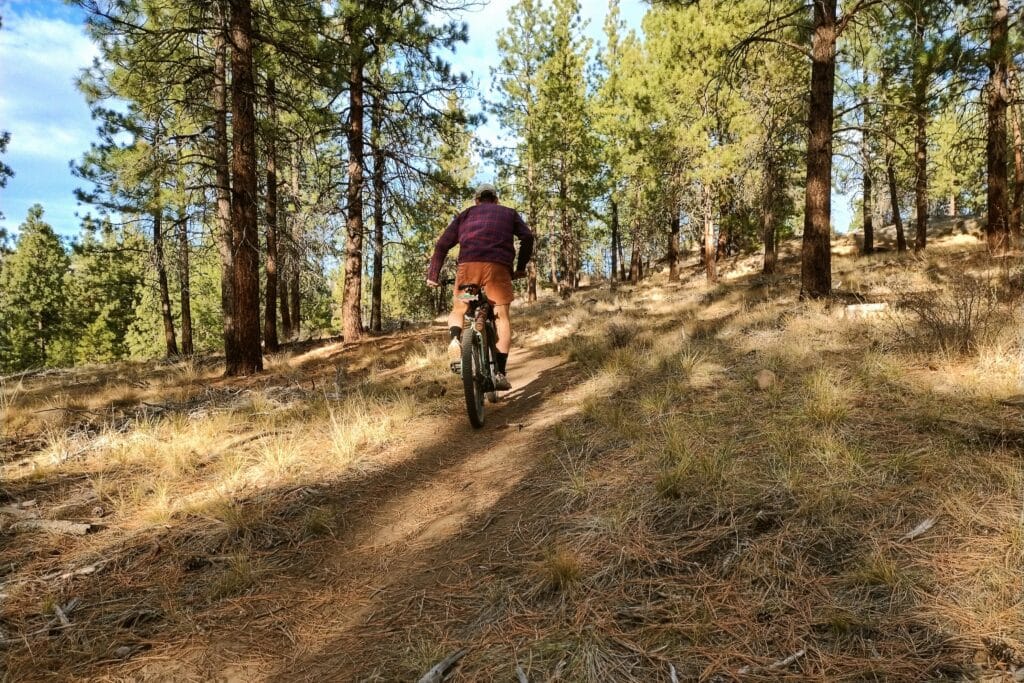
Most retro builds that I see are 26-inch ATBs. Those bikes are really cool. But retro ATBs aren’t unique or different from my Surly Grappler setup.
I wanted my Cheap Bike Build Off build to fill a niche unoccupied by my current bike stable. The bikes I own have big tires and wide bars. The Schwinn looks petite in comparison.
Pre-Build Specs
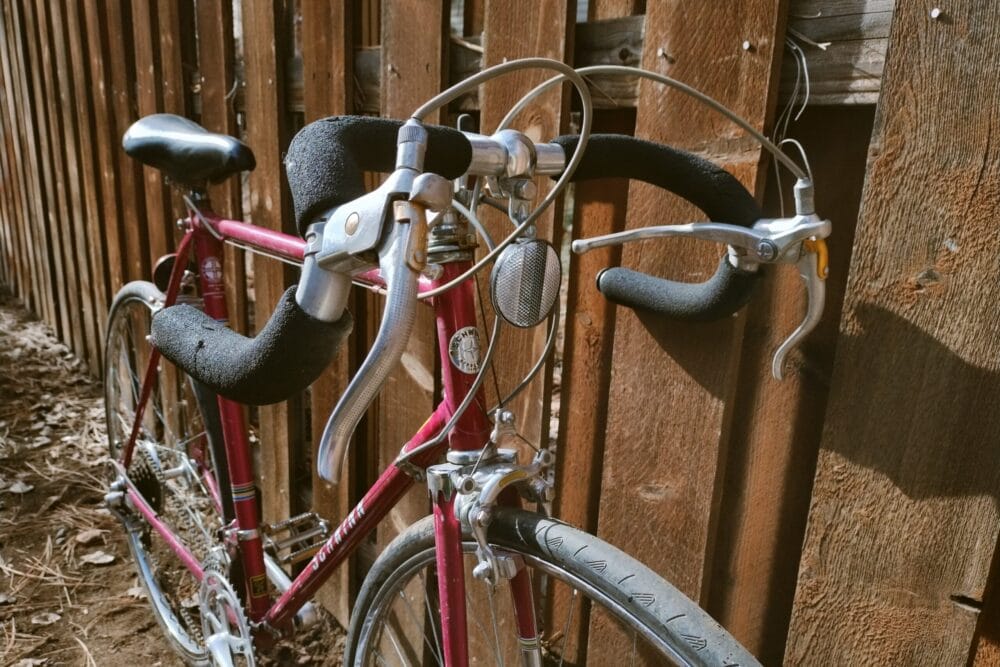
- Frame: Lug frame with single butted top and bottom tubes (except 25″ frame). All joints are lugged and brazed. Tubular front fork with chrome plate crown and 6″ fork ends.
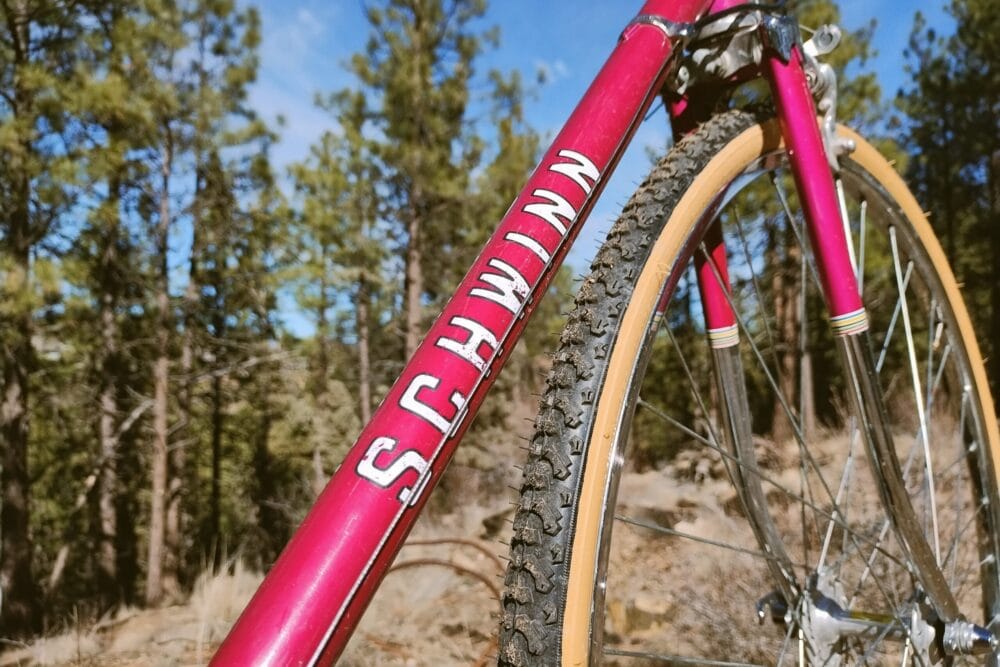
- Frame finish: Violet.
- Wheels: Araya steel tubular rims. Large flange quick release aluminum alloy hubs.
- Tires: Continental Ultra Tour 27” x 1 1/4” (not original).
- Handlebars and stem: Randonneur style aluminum handlebar. Forged aluminum alloy stem with recessed stem bolt.
- Pedals: Rattrap reflectorized pedals.
- Crankset: Schwinn-Approved aluminum alloy crankset (39-52 teeth sprocket). 6-3/4″ (170mm) crank arms.
- Derailleurs: GT-420 rear derailleur. GT-450 front derailleur. 14-17-20-24-28 rear freewheel cluster. Gear range of 38 low to 100 high.
- Brakes: Schwinn-Approved alloy center pull brakes with extension levers.
- Saddle: Ariake racing style saddle.
- Weight: Approximately 29 pounds (13.2 kilograms) depending on frame size.

Build Impressions
The Schwinn Le Tour II is a heavy bike despite its svelte look. Weight wasn’t a concern for me, though, because the build wasn’t performance-oriented.
Converting the bike to a flat bar 1x setup with gravel tires was the plan in my head from the very beginning of the process. I knew I would be removing or replacing most of the contact points and drivetrain on the bike.
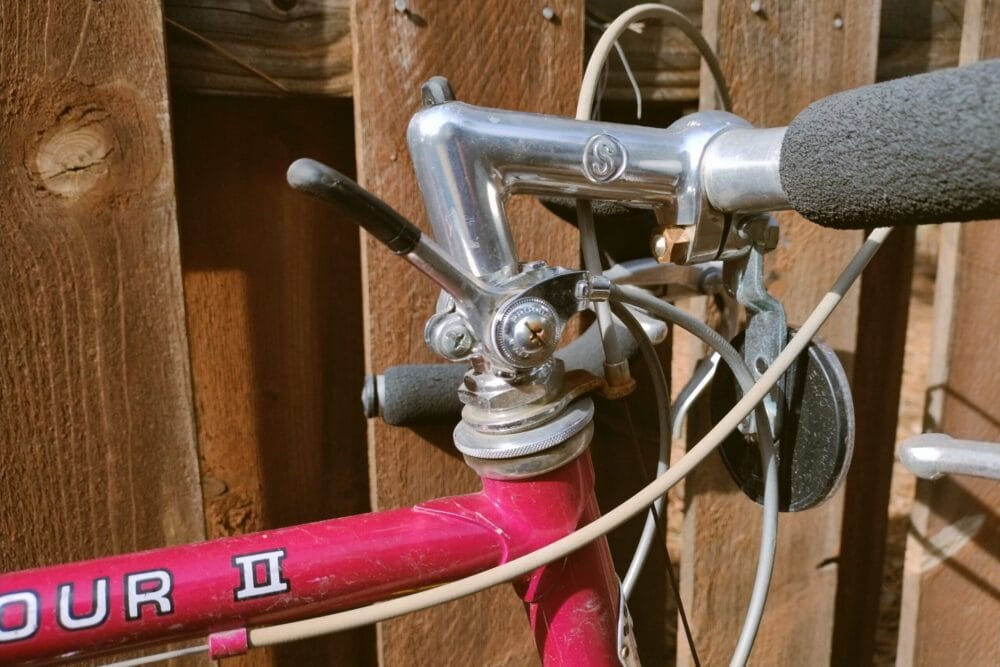
Spiders and spider webs were a theme during the bike’s teardown phase. It was obvious that the bike saw a lot of action, but also spent a lot of time unmaintained and stored outside. The most surprising spots I found spiders were the brake levers.
The handlebars, grips, and brake levers were the first to go. I wanted a flat bar setup, but the original cockpit was littered with levers and cables and was genuinely unsightly – even for a beater bike. All cables and housing were cut and discarded.
The seatpost and quill stem were points of contention. Both parts were firmly wedged into the frame, with years of rust acting like glue. The seatpost came with a rusty shim that frightened me. I kept the shim, though. But I replaced the saddle because the original saddle was falling apart.
The quill stem was in fairly good condition despite the surface rust. I removed the stem shifters and reinserted the stem with a dose of grease to prevent it from seizing in the future.
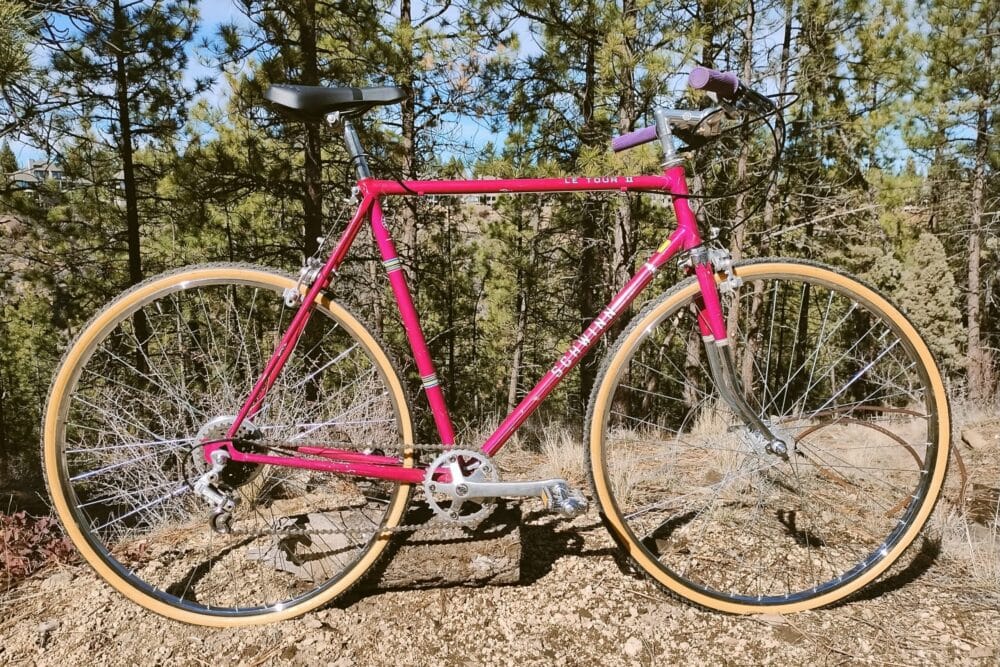
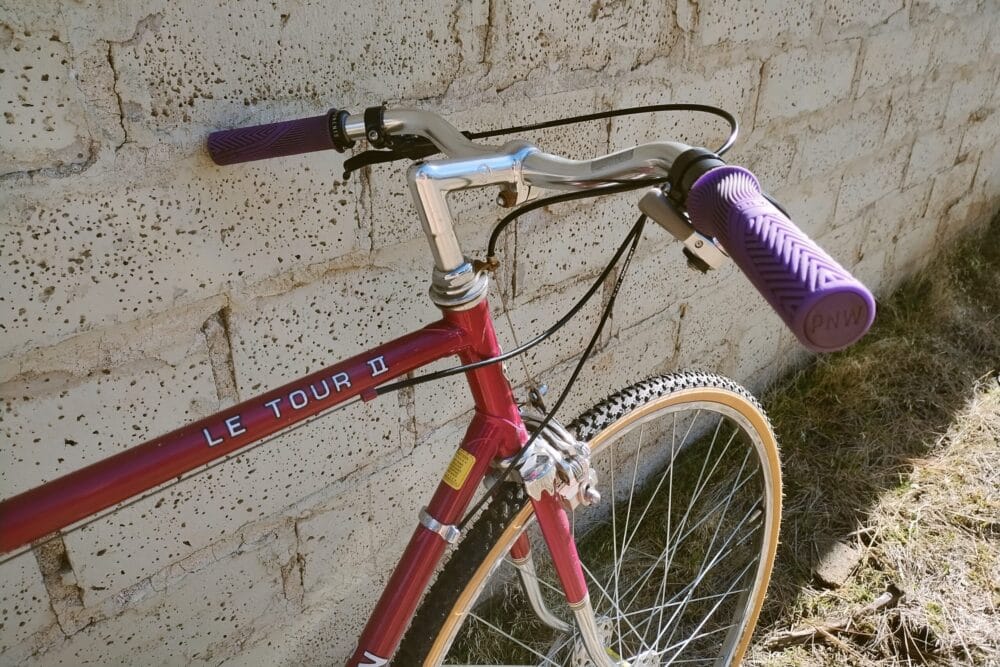
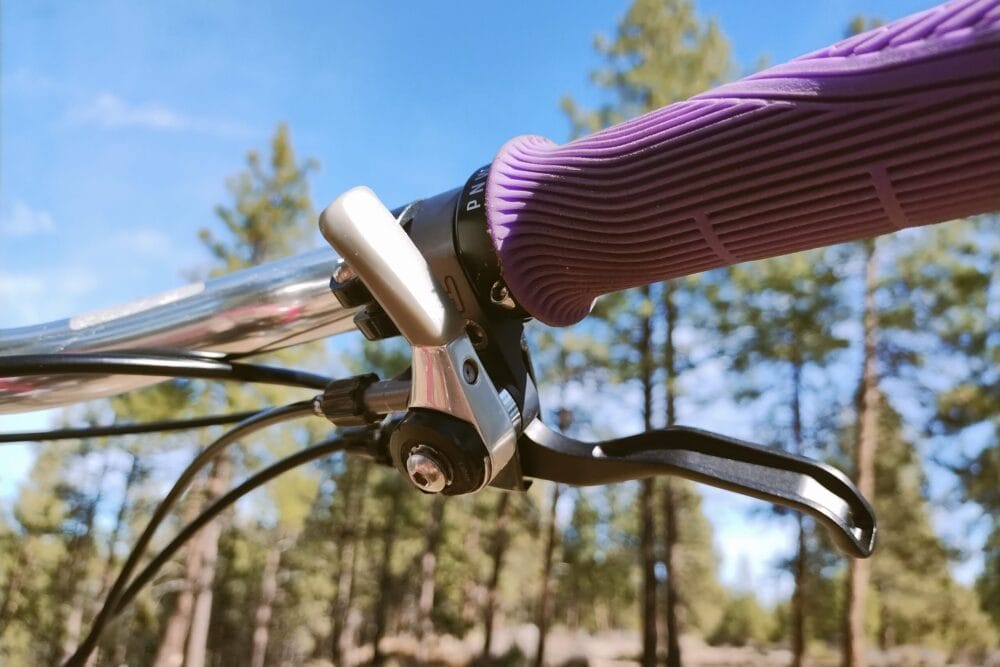
With the stem greased and the drop bars gone, I inserted a set of random café bars. I added used grips and brake levers from my personal parts bin. I was happy to find a place for my purple PNW Loam grips after deciding to remove them from my Ritchy Ultra.
For shifting, I used a Paul Thumbie with a beat-up Shimano Light Action front derailleur friction shifter that I found in a bike shop’s used parts bin. I flipped the shifter upside down to run it on the right side and to improve ergonomics.
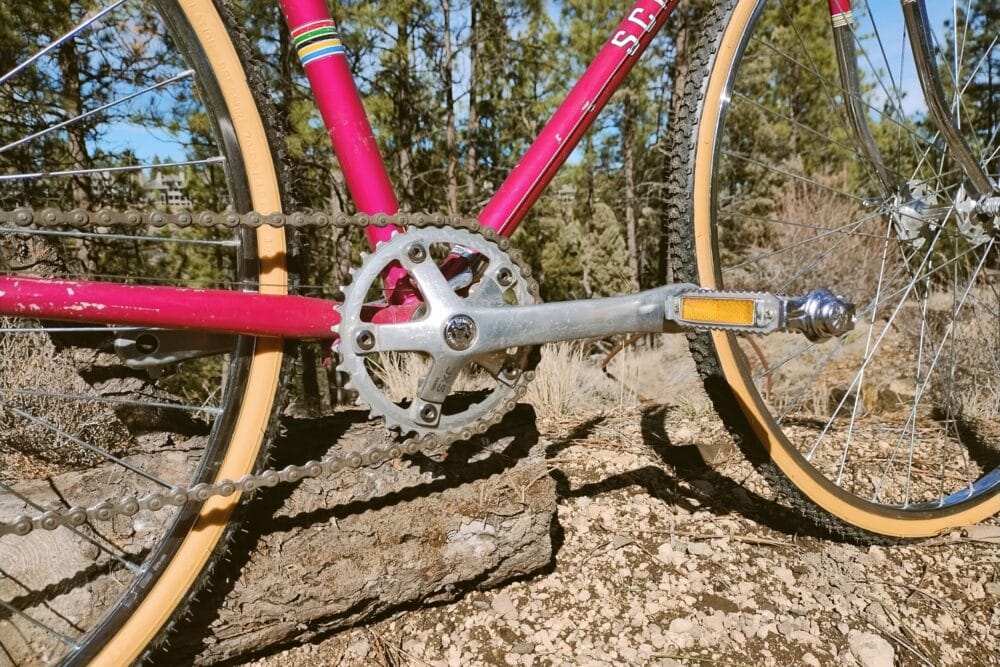
I removed the front derailleur to begin my 1x setup. The non-drive side crank had a slight bend that was noticeable at the top of the pedal stroke. I wanted to replace the cranks because the chainrings were much too large and would not be appropriate for a lighter 1x gear ratio.
A 52t/39t double chainring setup on a 30lb road bike is unrealistic for everyday riding. I used to race flat crits with a 50t up front and rarely would drop below my 14t in the back. There is no way I would use a 52t chainring in any possible scenario.
I found a vintage square taper crankset and a 36t chainring for more reasonable gearing, considering the minimal range in the back. The chainring was a standard Shimano middle ring with shift ramps. I don’t expect it to have a problem dropping the chain, though.
I shortened the chain to compensate for the smaller chainring up front, but that was the extent of my drivetrain work. I almost removed the pedals’ reflectors, but decided to leave them original because they give off a nice, classic look.
There wasn’t much left to do at this point other than cable everything up and install new tires. Setting up the brakes was smooth, and there were absolutely no issues setting up the friction shifter. I left the cables longer in the front because I may go with wider handlebars in the future. I should route the front brake cable over and behind the handlebars into the stem-mounted cable guide, but I don’t personally like that look.
I chose a slightly knobby tire in a 27” x 1 3/8” size that fit easily in the frame. Vintage road bikes were way ahead of their time in terms of tire clearance. I would have gone wider in the front if wider 27-inch tires were available.
I could also probably easily fit a 700c x 40mm tire in the back. Did you know that 27-inch wheels are a larger diameter than 700c/29-inch wheels? I didn’t. As I said, vintage road bikes were way ahead of their time.
I came in just under budget after converting the bike to a completely different setup. All components were in used condition except the tires. Here is the part and price list for the build:
- 1977 Schwinn Le Tour II – $75
- Random café handlebars – $5
- PNW Loam grips – $5
- Shimano Sora brake levers – $10
- Paul Thumbie w/ Shimano Light Action shifter – $5
- Selle Italia X-Base saddle – $10
- Sakae SXC crankset w/ 36t Shimano chainring – $10
- Kenda K161 27″ x 1 3/8″ tires – $44.86
- Cables and housing – $5
- Chainring bolt spacers – $2.50
- Total – $172.36
I purchased the bike from a private seller on Facebook Marketplace. I found the handlebars, shifter setup, saddle, and crankset in a local bike shop’s storage. I bought the tires online. All other components came from my personal parts bin.
Ride Impressions
Test rides up and down the street revealed that I could not backpedal without the chain dropping. I remedied the issue by lightly cleaning dirt and gunk out of the freewheel body. I’ll do a deeper clean on it once I get the correct removal tool, though.
The random café bars I installed are 570mm wide, which is really narrow compared to the 800mm handlebars I typically use on my other bikes. It took a while to get used to the narrow bars, and I may or may not keep them depending on whether I want to spend more money on the bike.
I found that stopping is more of a suggestion than anything else with the center pull brakes and steel rims. I didn’t replace the brake pads for the build off, but I will in the near future. I’m hoping new brake pads make a noticeable difference, but I’m not expecting much of an improvement.
I thought I could use this bike to pull my kids’ Burley trailer around town, but I wouldn’t feel comfortable knowing that braking could be an issue with even more weight pushing the bike forward. I have too many hills to descend to feel safe with the kids.
Speaking of hills, I don’t think I would enjoy pedaling the kids’ trailer uphill with a 36t/28t gear ratio, either. I also don’t think I could manage punchy singletrack on the bike. But I had no problems climbing my normal hilly route down and back to the river on pavement.
It was my first time installing and using friction shifting, and I have to say, I like it very much. Friction shifting is very intuitive. I’m also proud that I pulled off my idea of using a front shifter to shift all five cogs in the rear. Go me.
Final Thoughts
Participating in the Cheap Bike Build Off was a lot of fun. Yes, it’s technically not free, but it’s not a big investment. I relate it to buying an expensive Lego set. A bike gets way more play time after the build than the Lego set, though.
I want to make my Schwinn more functional. Front racks with baskets are functional. But getting a rack to work with fender mounts and center pull brakes isn’t easy or cheap. I’ll likely make a half frame bag to create some storage space on the bike.
I was pleasantly surprised that working on a nearly 50-year-old bike was easily done with a pair of adjustable wrenches. I’m also really happy with the result. I’m definitely going to try to participate in next year’s Cheap Bike Build Off, and I may even build up another vintage bike or two in the meantime.