- DIY Guides
- January 26, 2026
How to Make a DIY Stem Bag
Jared Kukura
Executive BIkefisher
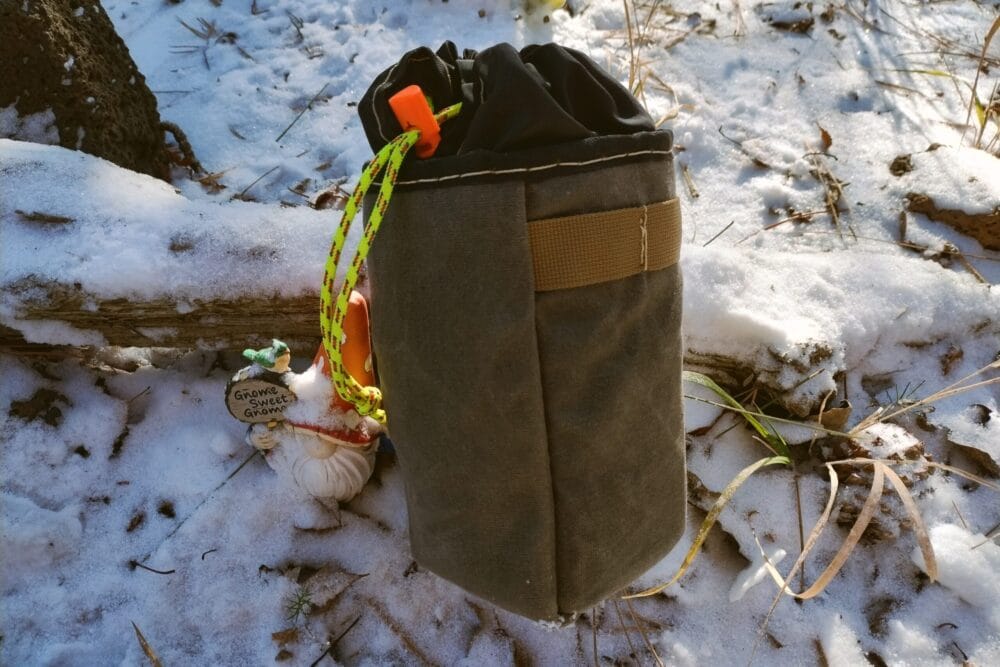
These step-by-step instructions will help you make a DIY stem bag for your bike. The design I used is relatively simple to construct because it only utilizes two body panels. The finished product has a boxy look. I like a boxy aesthetic for my bags.
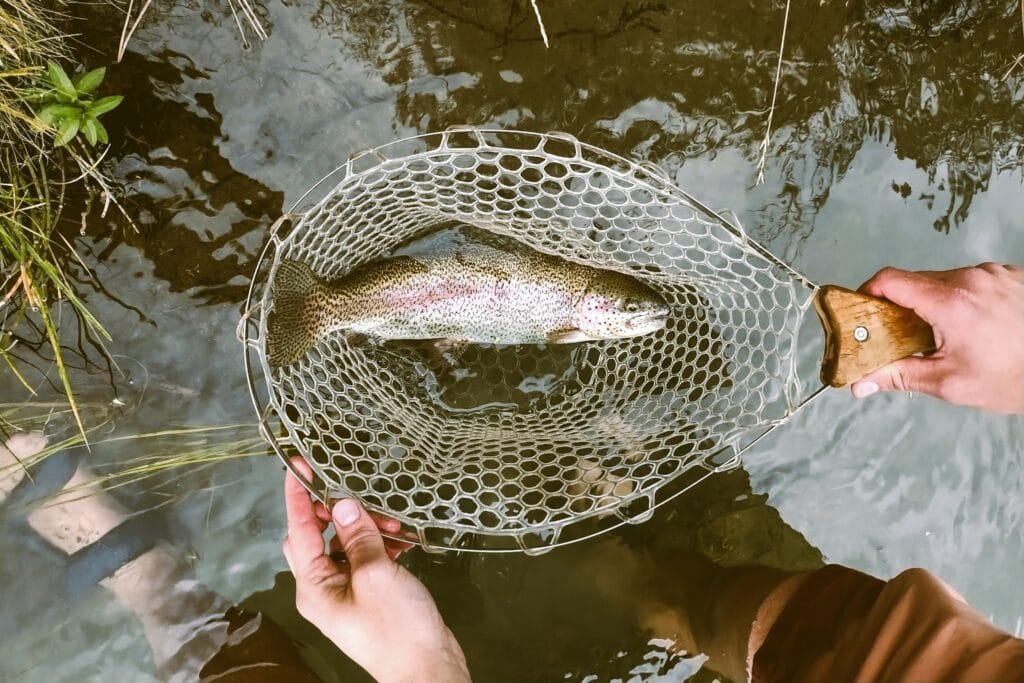
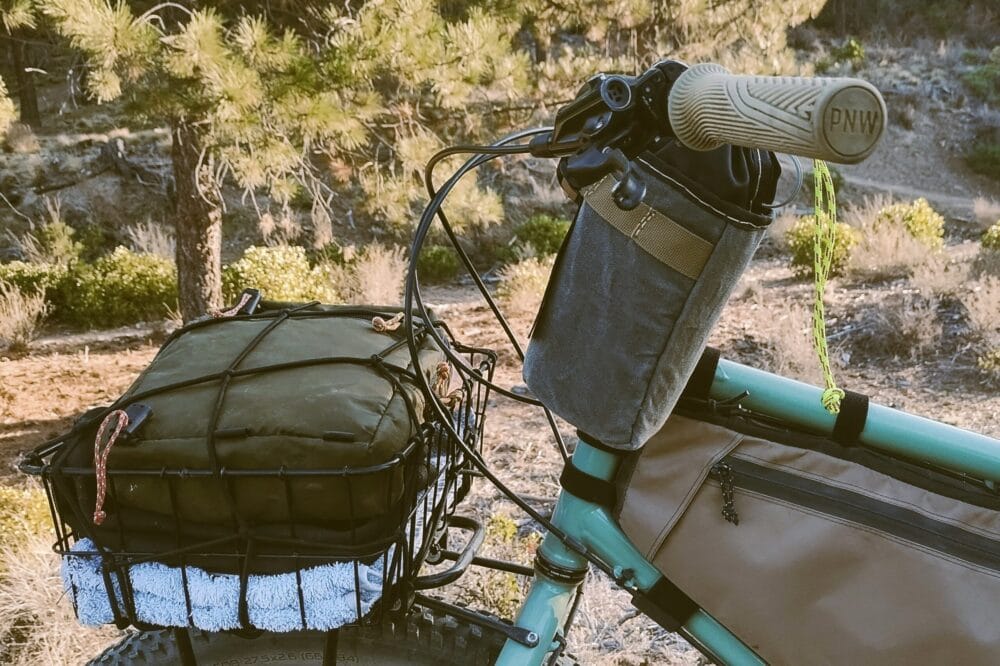
I use stem bags to carry water bottles or snacks, sunscreen, bug spray, a water filter, and my phone on my Surly Grappler. I use one stem bag for daily activities, but I use two stem bags for longer excursions or bikepacking trips.

Materials Used
- Waxed canvas fabric
- Ripstop nylon fabric
- 2mm foam padding
- 1-inch Cordura webbing
- 3/4-inch nylon webbing
- 1-inch grosgrain
- 1/8-inch paracord
- 1/8-inch shock cord
- Cord locks
- Cam buckles
Step-By-Step Instructions
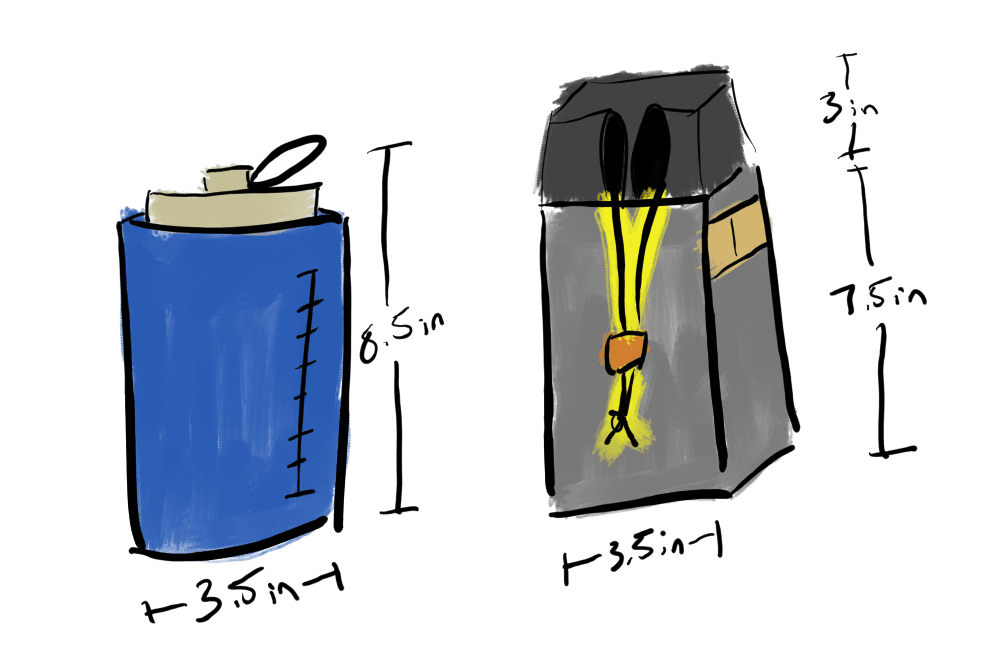
1. Determine the stem bag dimensions: I wanted my stem bags to fit a 1L Nalgene bottle. A 1L Nalgene bottle measures approximately 8 1/2 inches tall and 3 1/2 inches wide.
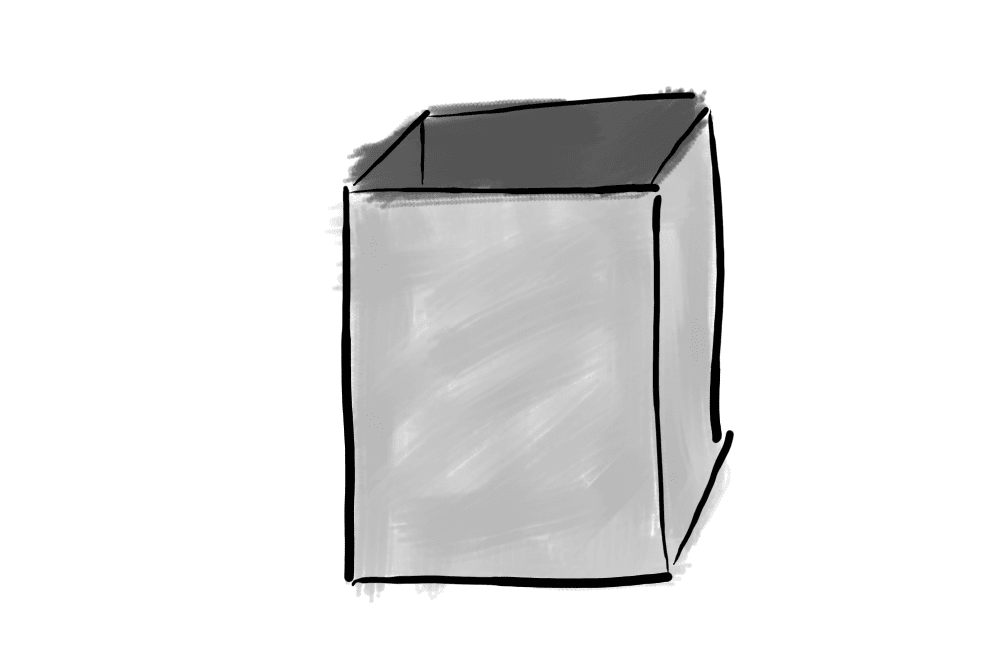
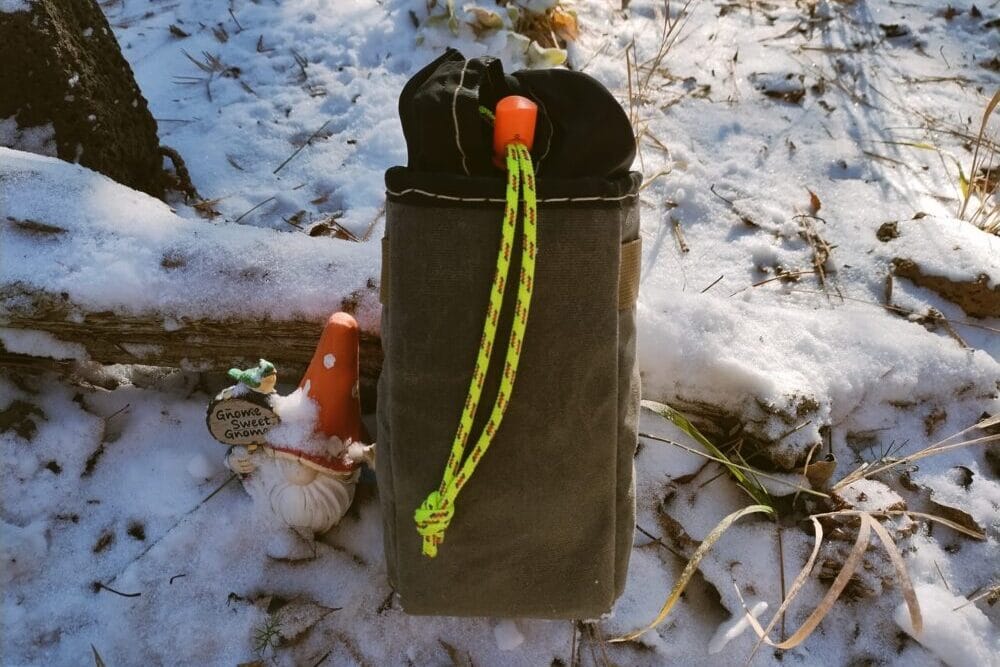
My stem bag’s main body is a rectangular 7 1/2 inches x 3 1/2 inches x 3 1/2 inches open-top box. The top fabric cinches the bag closed and adds 3 inches to the main body.
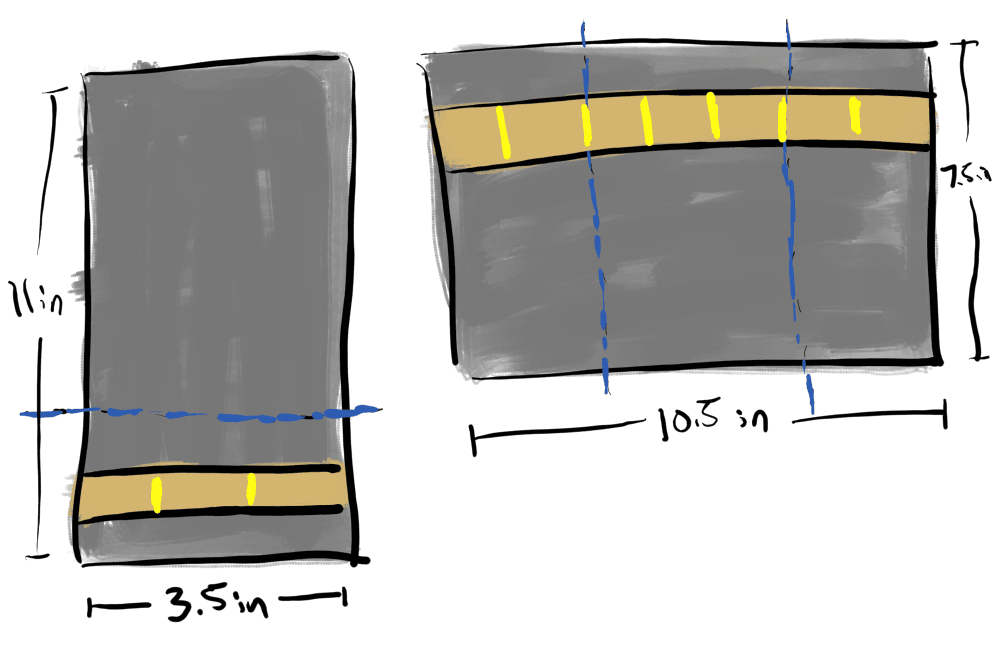
2. Measure and cut two body panels: One body panel will serve as the back and bottom of the bag. This panel on my bag measures 11 inches x 3 1/2 inches plus seam allowances on the side and bottom.
The other panel will serve as the front panel and the two sides of the bag. This panel on my bag measures 7 1/2 inches x 10 1/2, plus seam allowances on the sides and bottom.
3. Cut and sew the daisy chain webbing: Cut one length of webbing to match the 3 1/2-inch width, plus seam allowance of the first body panel. Sew it so that there are three equal daisy chain sections centered in the finished bottom of the bag. The middle of the webbing should be approximately 1 3/4 inches, plus seam allowance from the bottom of the panel.
Cut another length of daisy chain to match the 10 1/2-inch width, plus seam allowance of your second body panel. Sew it so that you have two equidistant daisy chains on the sides and three equidistant daisy chains on the front. I sewed the webbing with a 1-inch gap to the top of the panel.
4. Cut and sew the liner fabric and foam padding to the outer fabric: Cut the liner fabric to match the dimensions of the two body panels. Make sure you cut the foam padding smaller than the fabric you want to sew it between. Place the foam padding between the outer and inner liner fabrics before sewing along the edges to seal them together.
5. Sew the body panels together: Temporarily pin the two body panels together to form an inside-out, open-top box. Sew together the panels once they are aligned.
6. Finish the seams with grosgrain: Sew grosgrain along the seams of the connected body panels.
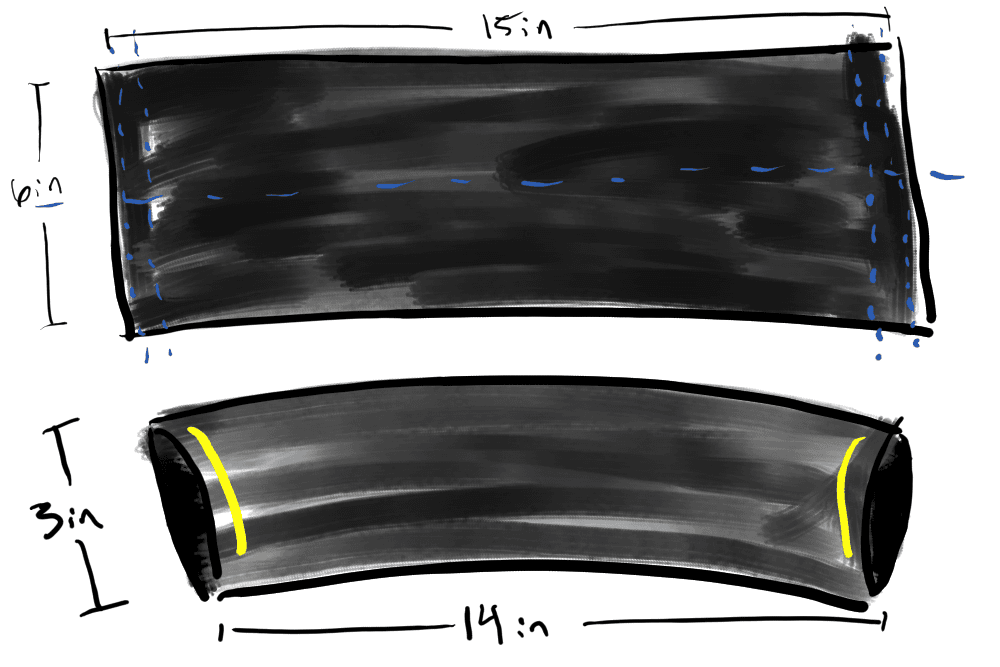
7. Measure, cut, and sew the cinch fabric: The top section of the final product is 3 inches x 14 inches. I cut the fabric 6 inches tall, plus double my seam allowance, since I fold it over lengthwise before sewing it to the top of the bag. I cut the fabric 15 inches long and made two 1/4-inch folds on each end of the fabric. I sew these folds down, so I have a clean edge to slide the paracord through.
8. Sew the cinch fabric to the top of the main body: Fold the cinch fabric lengthwise and temporarily pin it along the outside edge of the top of the main body. Start the cinch fabric in the middle of the back panel and ensure that the fabric will finish in approximately the same spot. Sew the cinch fabric to the main body once everything is aligned.

9. Finish the top seams of the bag with grosgrain: Sew grosgrain along the top junction where the cinch fabric and the main body were sewn together.
10. Flip the bag right-side out: Breathe a sigh of relief because everything looks right. Or, take a deep breath because you did something wrong. Don’t worry, it’s just a bag. You can rip apart seams and re-sew them if needed.
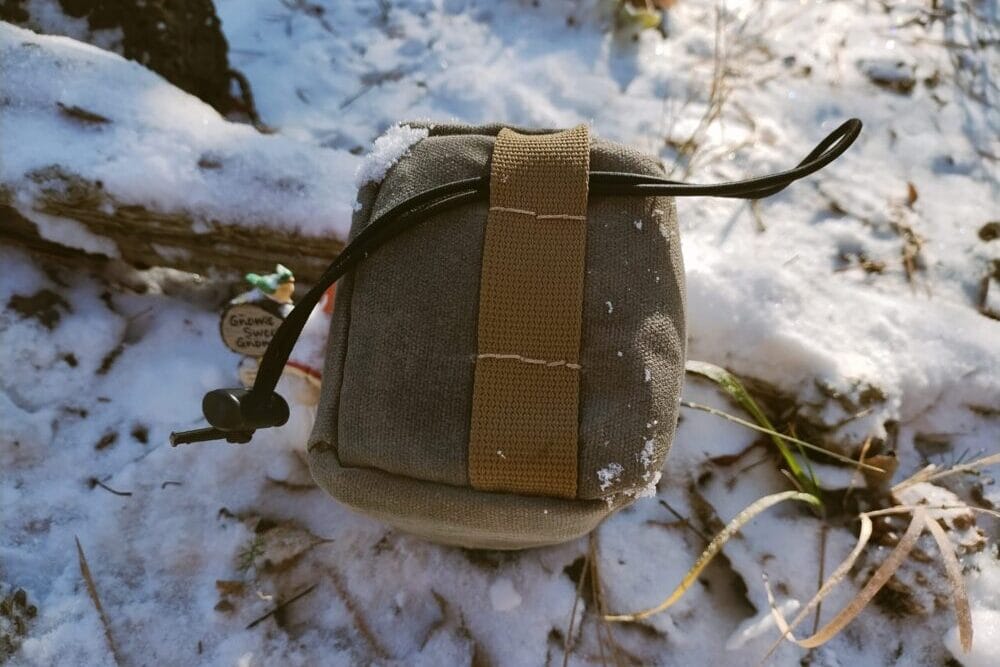
11. Add the paracord closure: Slide the paracord through one open end of the cinch fabric and out the other end. Add a cord lock and cut and tie off the end of the paracord.

Additional Notes
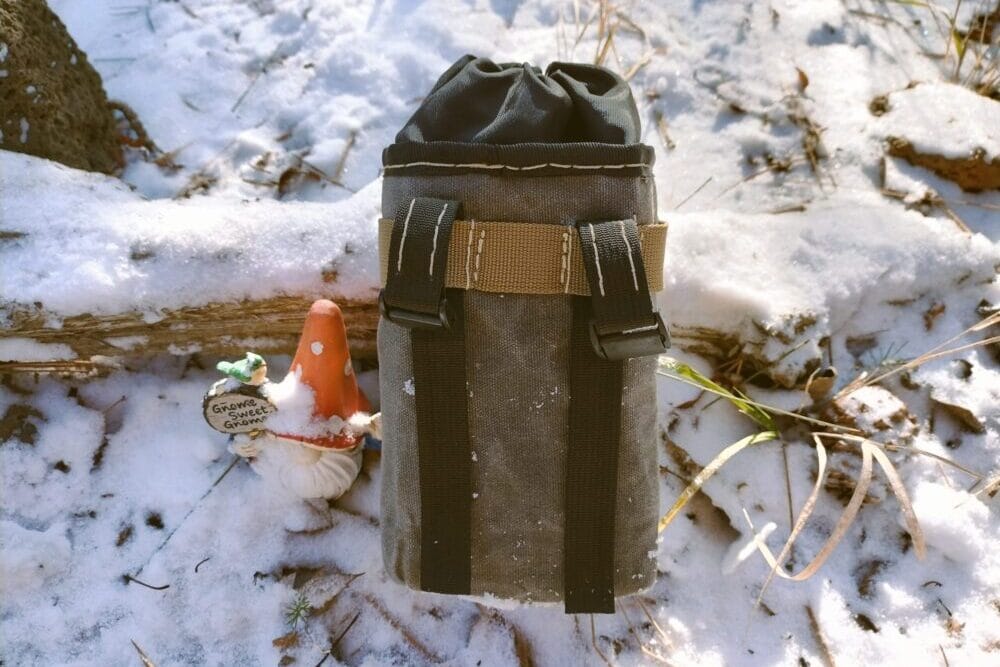
- I used 1-inch Cordura webbing for my daisy chain because it matched a set of my panniers. Nylon webbing works just as well. I sewed daisy chains along the front, sides, and bottom of my bags. I did not sew daisy chains on the back panel that faces away from the handlebars.
- Use Voile straps or make your own straps with 3/4-inch nylon webbing and cam buckles. I added two straps for the front of the bag to attach to the handlebars and one strap on the inside of the bag to go around the stem.
- This design allows you to secure two stem bags with a single strap around the stem.
- The daisy chain webbing on the bottom of the bag allows the use of a webbing strap to go under the fork crown or a shock cord loop to go around the head tube.
- I use a 3/8-inch seam allowance when I sew bags. You may want a different seam allowance depending on your skill level and if there is padding between fabric layers.
- I sewed my stem bags by hand without the help of a sewing machine. I do not recommend sewing by hand if you have access to a sewing machine. Sewing by hand takes a long time and can be painful on the body (at least for me).
Share this
Read More
- All Posts
- Bikefishing 101
- Blog
- DIY Guides
- Gear Reviews
- Quests